
Some of you out there have great ideas for businesses, but don’t have a dime to shell out for a website. It happens to the best of us. So while you’re saving your pennies for a more robust and professional website, here’s how to build a simple webpage for the interim.
Step One:
Don’t let code scare you. It’s just characters – just like the ones you’re reading right now – it just looks a little different. It’s like learning a new language – things look foreign at first, but the advantage you have here is you don’t have to know what things MEAN right away – you just have to know what things DO.
Step Two:
Open up TextEdit, or Notepad if you’re on a PC, and type the following:
(Note: be sure you’re typing in Plain Text mode and not Rich Text mode)
<!DOCTYPE html>

<html>

<body>

<h1>My First Heading</h1>

<p>My first paragraph.</p>

</body>

</html>
Those funky looking things that don’t look like normal text are called tags. They start with <> and end with </>. You simply tell it the type by adding in letters, words and/or numbers. But don’t worry about that quite yet. And remember, don’t let that scare you – It’s really a lot simpler than you think. Go ahead and save your document to your desktop as an HTML file. If you’ve saved it correctly you should be able to double click on the file and it will open in your default internet browser. You should see something like this:

If it doesn’t look like the image above, be sure you were in plain text mode and that you saved the file with the extension .html on the end.
Congratulations, you’ve just built your first webpage!
I know what you’re thinking – wow, that’s pretty ugly. Bear with me, we’ll make it look better in step four.
Step Three:
Let’s look at our code again:
<!DOCTYPE html>

<html>

<body>

<h1>My First Heading</h1>

<p>My first paragraph.</p>

</body>

</html>
You’ll notice that the text “My First Heading” was a lot bigger when you viewed it. This is because it uses a different tag than the “My first paragraph” sentence. One starts with <h1> and the other with <p>. The tag <h1> stands for heading and <p> stands for paragraph. When you’re done with a specific tag you simply tell it you’re done by adding a / like so: </h1>. Then you can move on to the next tag.
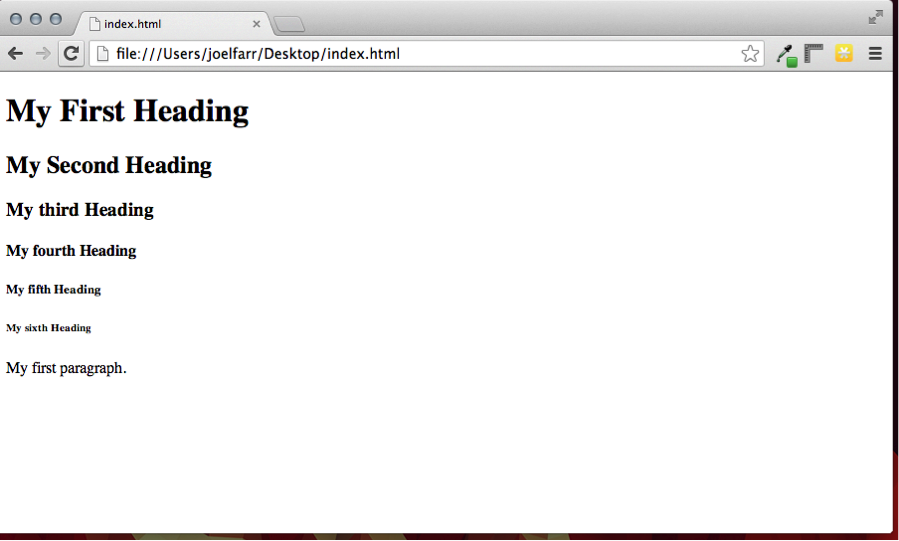
There is only one paragraph tag, but there are six heading tags as follows: <h1> <h2> <h3> <h4> <h5> <h6> The number portion of the tag determines the size with 1 being the biggest. You can see this illustrated if you add this to your code.
<!DOCTYPE html>

<html>

<body>

<h1>My First Heading</h1>

<h2>My Second Heading</h2>

<h3>My third Heading</h3>

<h4>My fourth Heading</h4>

<h5>My fifth Heading</h5>

<h6>My sixth Heading</h6>

<p>My first paragraph.</p>

</body>

</html>
Be sure to resave and then refresh the page in your browser to see your changes.
Your page should now look like this:
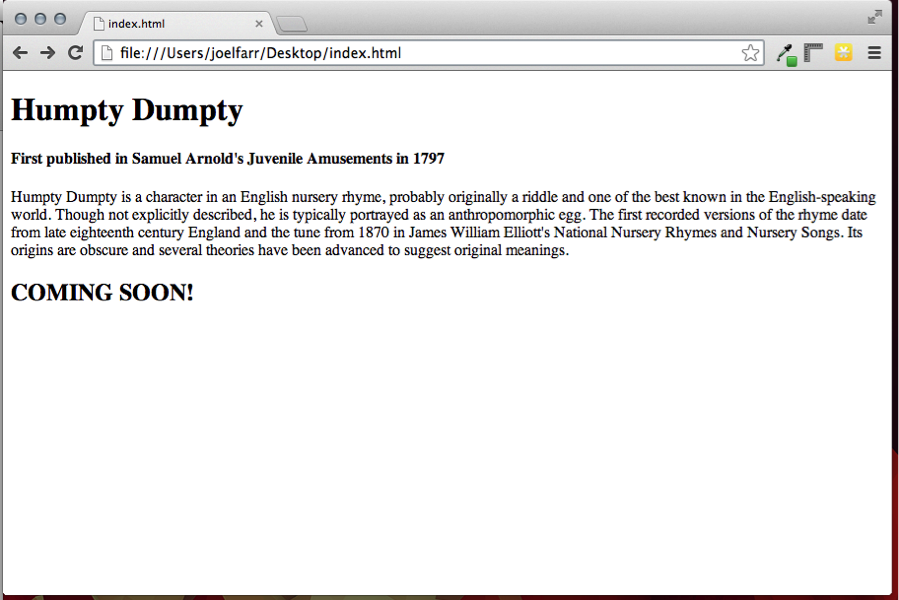
By now you should have a pretty good idea of how you can use these tags to format a document. You could code something like this:
<!DOCTYPE html>

<html>

<body>

<h1>Humpty Dumpty</h1>

<h4>First published in Samuel Arnold's Juvenile Amusements in 1797</h4>

<p>Humpty Dumpty is a character in an English nursery rhyme, probably originally a riddle and one of the best known in the English-speaking world. Though not explicitly described, he is typically portrayed as an anthropomorphic egg. The first recorded versions of the rhyme date from late eighteenth century England and the tune from 1870 in James William Elliott's National Nursery Rhymes and Nursery Songs. Its origins are obscure and several theories have been advanced to suggest original meanings.</p>

<h2>COMING SOON!</h2>

</body>

</html>
Your page should look a little more sophisticated by now – even if it is about Humpty Dumpty.
Great! But it’s still ugly right?!
Ok, let’s give it some color and formatting.
Step Four:
Back to the code.
We can add a little style and color to our webpage simply by typing in a few more lines. I’ve highlighted what I’ve added in blue.
<!DOCTYPE html>

<html>

<body style=”background:lightblue; color:white; font-family:Arial; width:500px; margin:100px auto 0px auto; text-align:center”>

<h1>Humpty Dumpty</h1>

<h4>First published in Samuel Arnold's Juvenile Amusements in 1797</h4>

<p>Humpty Dumpty is a character in an English nursery rhyme, probably originally a riddle and one of the best known in the English-speaking world. Though not explicitly described, he is typically portrayed as an anthropomorphic egg. The first recorded versions of the rhyme date from late eighteenth century England and the tune from 1870 in James William Elliott's National Nursery Rhymes and Nursery Songs. Its origins are obscure and several theories have been advanced to suggest original meanings.</p>

<h2>COMING SOON!</h2>

</body>

</html>
We only added a couple lines of code and things look drastically different:
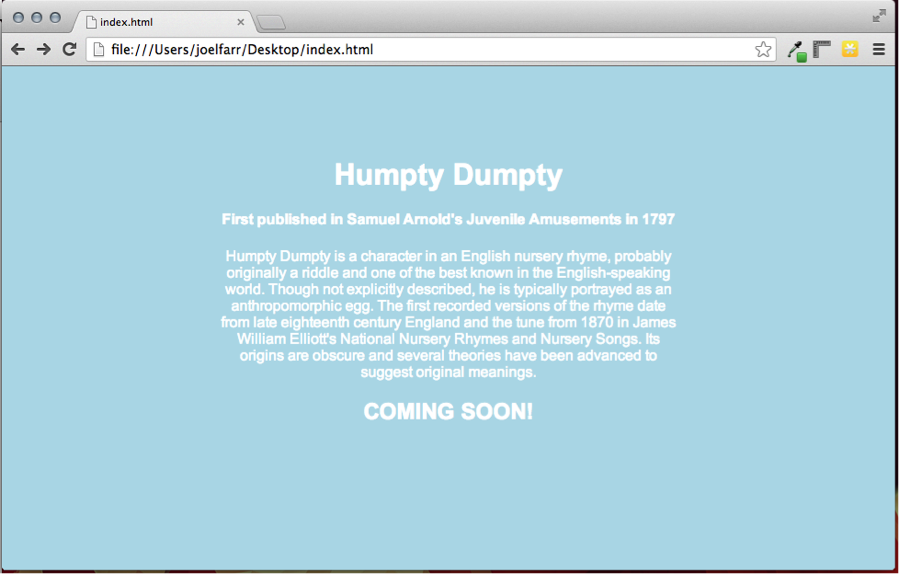
Most of the information we added is pretty self-explanatory. We told the browser, through code, that we wanted to change the background to light blue, the font to Arial, the font color to white, and lastly to center it all up nicely and give it a width of only 500 pixels. Pretty cool, right? Go ahead and play around with those numbers and settings to get a look you like!
Step Five:
In our last step we’ll go crazy and add a picture of Humpty Dumpty to our launch/landing page to give it some more visual power.
First, you’ll need an image. You’ll probably want an image with the extension of .png instead of .jpg. This file type allows transparent backgrounds and makes things look much nicer.
Once you have your image, be sure to put it in the same directory that your code file is in – otherwise things won’t work right. You also may want to size your image appropriately. Since we are using a 500 pixel width here for our content area, we’ll want to be sure the image is quite a bit smaller than that.
Once you have your image ready just add the following to your code (additions in blue):
<!DOCTYPE html>

<html>

<body style=”background:lightblue; color:white; font-family:Arial; width:500px; margin:100px auto 0px auto; text-align:center”>

<h1>Humpty Dumpty</h1>

<h4>First published in Samuel Arnold's Juvenile Amusements in 1797</h4>

<img src=”humptydumpty.png” />

<p>Humpty Dumpty is a character in an English nursery rhyme, probably originally a riddle and one of the best known in the English-speaking world. Though not explicitly described, he is typically portrayed as an anthropomorphic egg. The first recorded versions of the rhyme date from late eighteenth century England and the tune from 1870 in James William Elliott's National Nursery Rhymes and Nursery Songs. Its origins are obscure and several theories have been advanced to suggest original meanings.</p>

<h2>COMING SOON!</h2>

</body>

</html>
And here is the result:
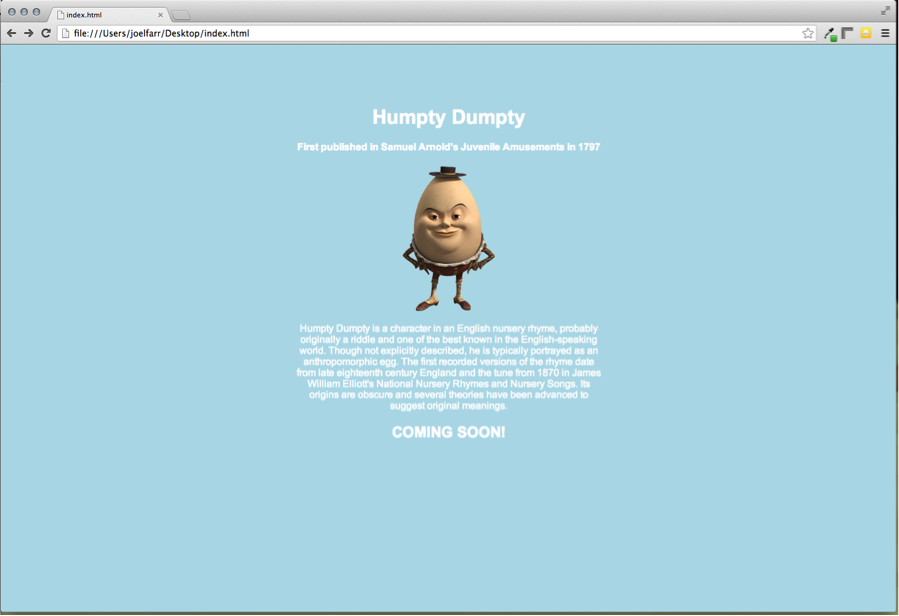
You should have enough knowledge now to add text, headings and images to your webpage! If you made it this far, and want to learn more, I recommend heading over to W3School’s website and learning other tags, more code, and more about styling your webpages. You could also visit this site as an HTML resource to get started.
If you’re having trouble – or things aren’t quite working right – feel free to leave a comment below and I’ll do my best to help you out!